
How to setup SMS campaign ?
On the left Panel, go to Campaign >> Create your campaign
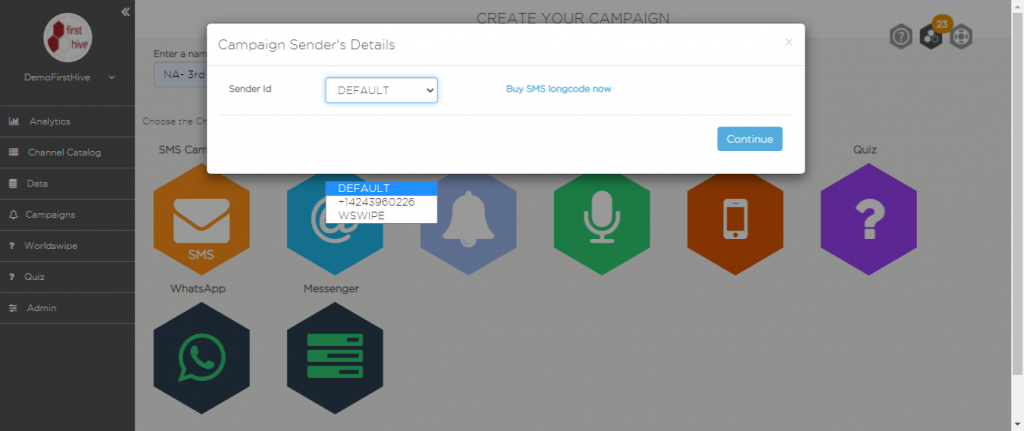
- Enter the name for your SMS campaign
- Click on the SMS icon

- Choose your sender ID and click on continue or you can also Buy SMS Long Code
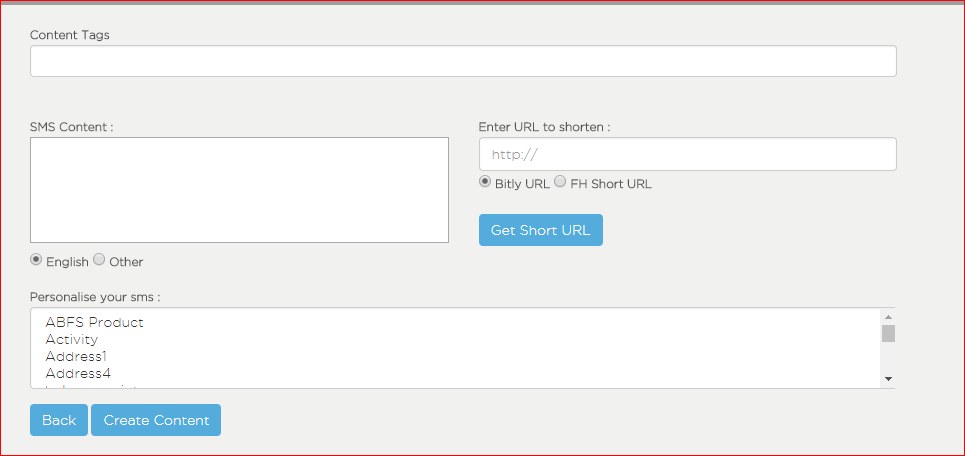
- Add content tags
- Enter your SMS content in your preferred language
- You can personalize your message with the customer’s details by double-clicking the parameter from the “Personalise your SMS” box.
- For any call to action URL, we recommend you use the short URL.
– Bitly short URL will only provide you click analytics.
– FirstHive a short URL will give you advance analytics and user interaction data. - Click on create content.
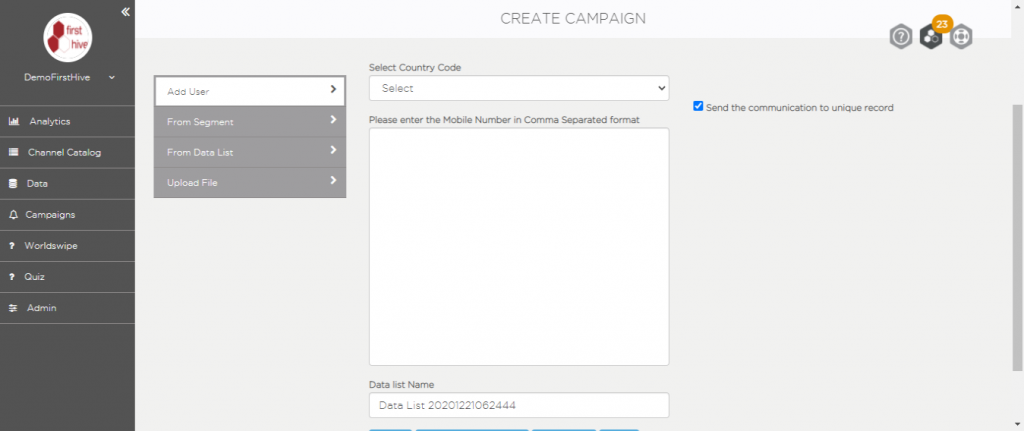
- Select the Audience that you would like to target by either selecting Datalist, Segment or directly uploading the audience that you would like to send your SMS. Note: The contact list of users should have the necessary country code for the campaign to work properly.
- You can add the Exclusion list if any or just press on ‘Continue’ to see the preview.
-Press ‘Skip’, if you are just creating the template and want to execute the campaign in FH- Journey orchestration interface.
How to test the SMS before making the campaign live?
In the preview screen, before scheduling or executing your campaign.
- Select the country code.
- Enter your test phone number and click on ‘Send Test SMS’.
After testing the campaign, you can click on Execute now or Schedule it for a later date.
How to edit my SMS campaign?
Go to Campaigns >> Manage Campaigns
Editing scenarios:
Voice content can be edited only for the Voice in Draft mode/status.
- Search for the campaign to be edited
- In the Action column, click on edit icon
To remove an audience from targeting for a live campaign.
- Search for the live campaign
- In the Action column, click on the user icon
To add or update the exclusion list for live campaigns.
- Search for the live campaign
- In the Action column, click on the Assign/Edit Exclusion list icon.
- Select the exclusion list or replace it with the new list.